Command line
-
How to invoke the program
-
Location
- Default installation location: /opt/owfs/bin/
So a typical command line would be:
/opt/owfs/bin/owserver -u
- Making links to the more standard /usr/bin directory involves the following commands:
(fortunately this works even after updating or reinstalling owfs)
sudo ln -s /opt/owfs/bin/* /usr/bin
- Default installation location: /opt/owfs/bin/
-
Choosing the program
OWFS includes a number of programs, with different approaches to the same information:- owfs -- shows 1-wire structure as a (virtual) filesystem. Getting information is as easy as reading a file or directory listing.
- owhttpd -- a web server showing 1-wire information in the same format as the filesystem
- owftpd -- allows FTP access to 1-wire information (again these are virtual files, no actual filesystem information is accessed).
- owserver -- 1-wire information is provided in a special network protocol that is readable by any of the other programs plus a number of smaller utilities.
-
Getting help
All the command line option descriptions are available via the --help argument. See this page.
-
-
Specifying Bus Master
-
Standard serial DS9097U

- serial port
/opt/owfs/bin/owserver -d /dev/ttyS0 # serial port "0" -- usually needs to be run as sudo or adjust permissions
- USB->serial adapter (check dmesg)
/opt/owfs/bin/owserver -d /dev/ttyUSB0 # serial port /dev/ttyUSB0 -- usually needs to be run as sudo or adjust permissions
- serial over network
sudo ser2net -C "3333:telnet:0:/dev/ttyUSB0:9600 1STOPBIT 8DATABITS remctl" # on 192.168.1.12
/opt/owfs/bin/owserver -d 192.168.1.12:3333 # host (192.168.1.12) and port number (3333) should be adjusted to your situation
- serial port
-
ibuttonLink's LINK
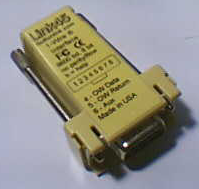
- In DS9097U emulation mode, just use the same syntax as DS9097U above.
- serial port
/opt/owfs/bin/owserver -d /dev/ttyS0 # serial port "0" -- usually needs to be run as sudo or adjust permissions
- USB->serial adapter (or LinkUSB)
/opt/owfs/bin/owserver -d /dev/ttyUSB0 # serial port /dev/ttyUSB0 -- usually needs to be run as sudo or adjust permissions via udev
- serial over network
sudo ser2net -C "3333:telnet:0:/dev/ttyUSB0:9600 1STOPBIT 8DATABITS remctl" # on 192.168.1.12
/opt/owfs/bin/owserver -d 192.168.1.12:3333 # host (192.168.1.12) and port number (3333) should be adjusted to your situation - LinkHubE (essentially a LINK with Xport telnet serial control)
/opt/owfs/bin/owserver --link=192.168.2.23 # need to know the IP address of the LinkHubE
-
Dallas USB DS9490R

- Single usb device
/opt/owfs/bin/owserver -u # often needs to be run as sudo or change permissions via udev
- Specified USB device
Awkward, since the USB device order is not consistent
/opt/owfs/bin/owserver -u2 # second USB device as enumerated by libusb
- All USB adapters
/opt/owfs/bin/owserver -uall # All adapters seen when program starts
- All USB, and keep looking for more
/opt/owfs/bin/owserver --usb=scan
- Single usb device
-
HA7Net

- Specified address
/opt/owfs/bin/owserver --ha7net=192.168.1.12 # you need to know the address
- Auto-discover address
/opt/owfs/bin/owserver --ha7net
- Uses udp multicasting to find HA7Net
- Check firewall settings and routing since the private multicasting may be blocked
- Specified address
-
HA7S/E

- Serial
/opt/owfs/bin/owserver --ha7s=/dev/ttyS0 # run as sudo or adjust permissions
- Serial->USB adapter
/opt/owfs/bin/owserver --ha7s=/dev/ttyUSB0 # run as sudo or adjust permissions in udev
- Serial over TCP
sudo ser2net -C "3333:telnet:0:/dev/ttyUSB0:9600 1STOPBIT 8DATABITS remctl" # on 192.168.1.12
/opt/owfs/bin/owserver --ha7s=192.168.1.12:3333 # host (192.168.1.12) and port number (3333) should be adjusted to your situation
- Serial
-
HA5

- Adapter with multidrop capabilities
- Each HA5 identified with a letter (a-z) -- the Channel.
- Channel settable by switches on the adapter
- Autodiscovery of checksum status
- Autodiscovery or specified channel
- RS232 serial ( RS485 also supported with appropriate hardware )
- Single channel, autodiscovered
/opt/owfs/bin/owserver --ha5=/dev/ttyS0 # run as sudo or adjust permissions
- Single channel, specified channel
/opt/owfs/bin/owserver --ha5=/dev/ttyS0:b # Channel "b" -- run as sudo or adjust permissions
- Multiple channels, autodiscovery
/opt/owfs/bin/owserver --ha5=/dev/ttyS0:all # Try all channels -- run as sudo or adjust permissions
- Multiple channels, specified channels
/opt/owfs/bin/owserver --ha5=/dev/ttyS0:abg # Channel "a", "b" and "g" -- run as sudo or adjust permissions
- Serial over TCP, single channel, autodiscover
sudo ser2net -C "3333:telnet:0:/dev/ttyUSB0:9600 1STOPBIT 8DATABITS remctl" # on 192.168.1.12
/opt/owfs/bin/owserver --ha5=192.168.1.12:3333 # host (192.168.1.12) and port number (3333) should be adjusted to your situation - Serial over TCP, single channel, specified channel
sudo ser2net -C "3333:telnet:0:/dev/ttyUSB0:9600 1STOPBIT 8DATABITS remctl" # on 192.168.1.12
/opt/owfs/bin/owserver --ha5s=192.168.1.12:3333:a # channel "a" -- host (192.168.1.12) and port number (3333) should be adjusted to your situation - Serial over TCP, single channel, specified channel, localhost
sudo ser2net -C "3333:telnet:0:/dev/ttyUSB0:9600 1STOPBIT 8DATABITS remctl" # on same machine
/opt/owfs/bin/owserver --ha5=:3333:a #  Channel "a" -- port number (3333) should be adjusted to your situation
- Adapter with multidrop capabilities
-
USB9097

- Functionally a DS9097U with integrated USB->serial adapter
- USB
/opt/owfs/bin/owserver -d /dev/ttyUSB0 # run as sudo or adjust permissions in udev
-
OW-SERVER-ENET

/opt/owfs/bin/owserver --enet=192.168.2.3 # Need to know the ip address
-
i2c DS2482-X00
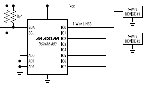
- The addressing is intricate enough to have it's own page.
- i2c adapters (buses) are assigned device address like /dev/i2c-0, /dev/i2c-1, ...
- within each i2c up to 8 DS2482 devices can be placed, each with addresses 0x18, 0x19 ... 0x1F
- autodiscovery of both the i2c bus and the DS2482 address is supported
- Simple i2c invocation (just find the first DS2482)
/opt/owfs/bin/owserver --i2c # run as sudo or adjust permissions
- Choose the i2c bus
opt/owfs/bin/owserver --i2c=/dev/i2c-0 # First DS2482 on bus 0 -- run as sudo or adjust permissions
- Choose the i2c bus and address
opt/owfs/bin/owserver --i2c=/dev/i2c-0:2 # i2c bus 0 address 2 (0x1A) -- run as sudo or adjust permissions
- Choose the i2c bus and all addresses
opt/owfs/bin/owserver --i2c=/dev/i2c-0:all # i2c bus 0 -- run as sudo or adjust permissions
- Choose all DS2482 devices ( all buses and addresses )
opt/owfs/bin/owserver --i2c=all:all # -- run as sudo or adjust permissions
- The addressing is intricate enough to have it's own page.
-
Kernel module W1
/opt/owfs/bin/owserver -w1 # run as sudo since netlink can only be accessed by root
- Requires both kernel module wire1 and individual modules for the omap_hdq or ds9094 or i2c bus masters
- Actual bus masters will appear and disappear as they are recognised by the operating system
-
Simulated adapters FAKE, MOCK, TESTER
-
owserver
- Local host, default port
/opt/owfs/bin/owserver -u # default port 4304 -- often needs to be run as sudo or change permissions via udev
/opt/owfs/bin/owdir # directory listing -- default IANA port 4304 - Local host, specified port
/opt/owfs/bin/owserver -u -p 4444 # often needs to be run as sudo or change permissions via udev
/opt/owfs/bin/owdir -s 4444 # directory listing -- same port 4444 - Remote host, specified port
/opt/owfs/bin/owserver -u -p 4444 # on 192.168.1.2 -- often needs to be run as sudo or change permissions via udev
/opt/owfs/bin/owdir -s 192.168.1.2:4444      # directory listing -- match owserver address
- Local host, default port
-
-
Specifying "Target"
-
owfs mountpoint
-
owhttpd address
-
owfttp address
-
owserver address
-
Previous page: Startup USB scan
Next page: Ubuntu setup